How to use a synced cookie as a request parameter variable in Postman API Testing
![]()
Let us start from the beginning
Let's start with a kind of let down (maybe)
- The request
- The Cookies tab
- The column that shows if the cookie in the row is secure or not. This has to be false (non-secure)
- The main cookie used as a sample in the following description.
 Click on the image for a bigger picture
Preparing cookie management in Postman
!! During the process the Google Chrome extension Postman interceptor is required. So I assume that you are using the Google Chrome web browser when reading the remainder of the article.
Let's get started
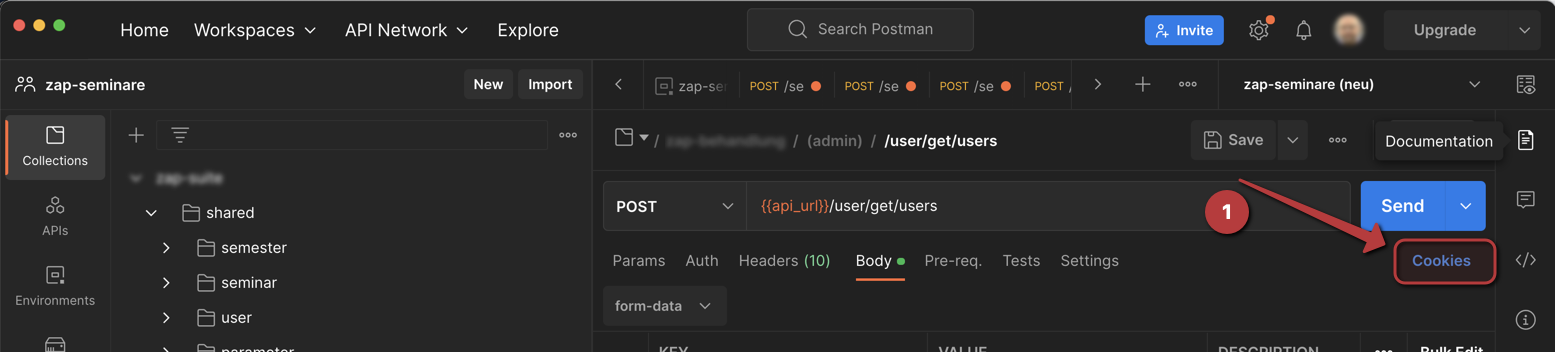
We start by clicking on the Cookies button just below the Send button.
 Click on the image for a bigger picture
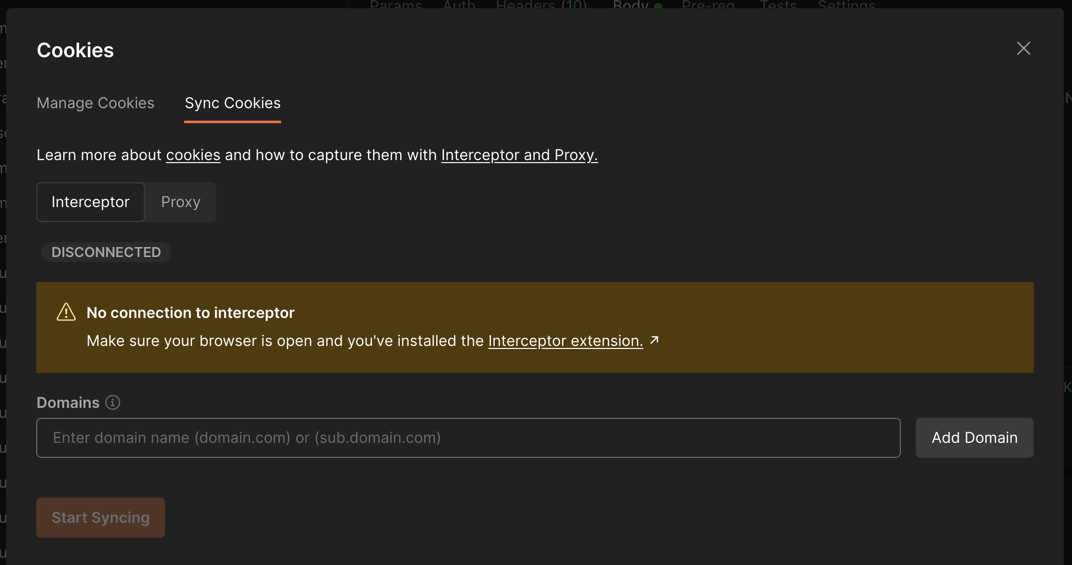
Now the window titled Cookies pops up containing 2 tabs:
- Manage cookies
- Sync Cookies
By default it will open up displaying the Sync Cookies tab because there is no cookie intercepter installed in Google Chrome. When you just follow the link labeled interceptor extension, it will open the extension page in Google Chrome from which you install the Postman interceptor plugin with a single click.
 Click on the image for a bigger picture
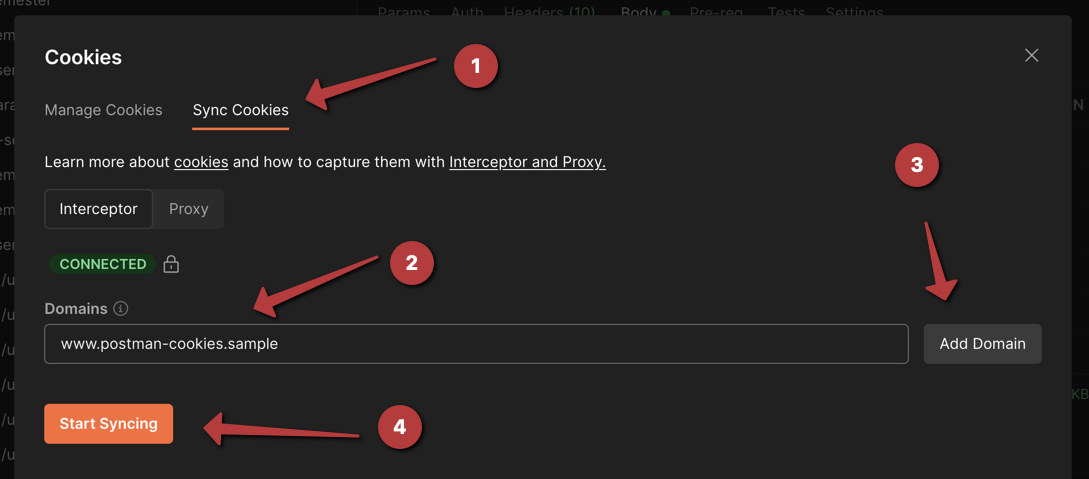
After that is done Postman will immediately notice that the extension is installed by showing a green CONNECTED and a small lock symbol. Now you can add domains of which you want to intercept changes to the cookies.
!!! When you enter a domain name without www or a subdomain prefix, it will intercept all cookies of sites with the entered domain, that is including any subdomains.
- Goto the Sync Cookies tab (if not already active)
- Enter the domain name
- Click on Add Domain (repeat step 2 and 3 for any other domains)
- Conclude by clicking Start Syncing
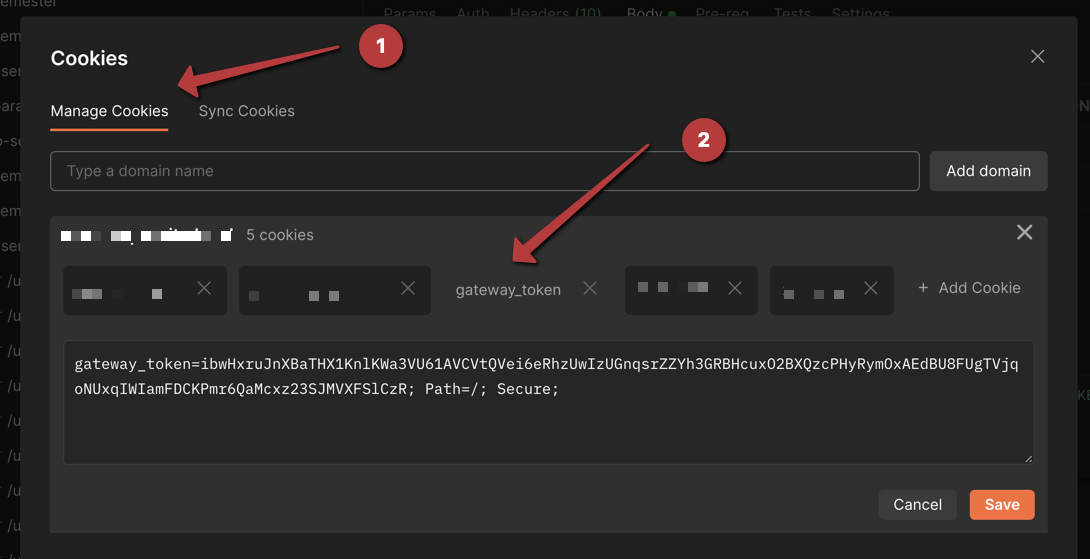
After the sync is initiated and started we can see the effect of what we just have done.
- Click on the Manage Cookies tab.
- Click on the cookie you want to investigate. You can make changes here, but that doesn't make any sense if you have an auto sync in place.
 Click on the image for a bigger picture
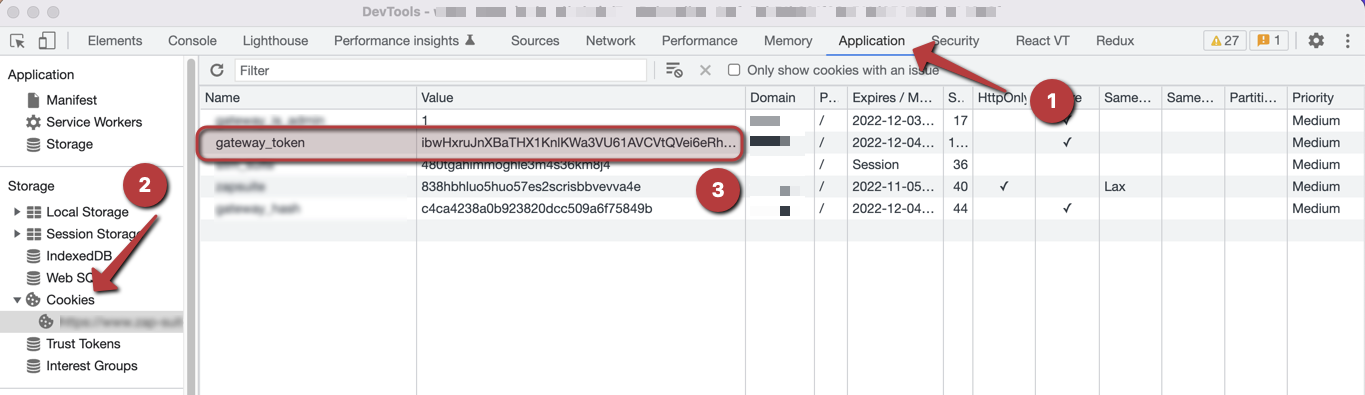
In the webbrowser you can open the developer tools by pressing F12.
- Click on Application tab/menu, positioned after Memory and before Security.
- Find your domain in the Cookies section on the left side.
- The cookie that we want to check, this should be the same as the value in Postman, as seen in the former step.
 Click on the image for a bigger picture
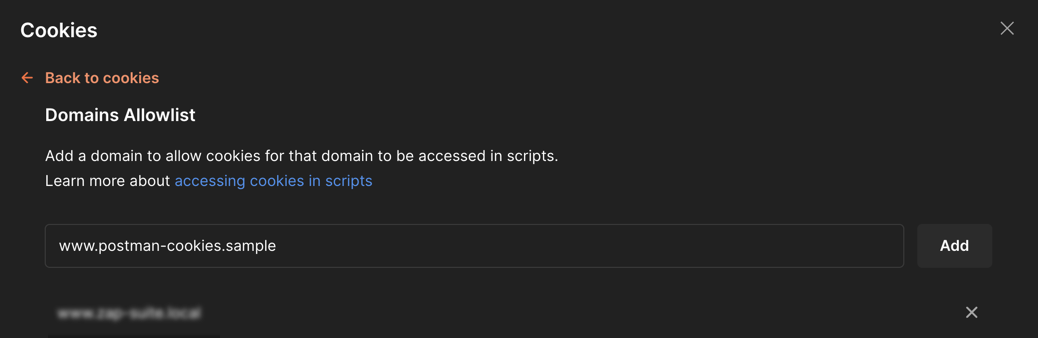
To use the values in our scripts you have to add the domain(s) to a so called Allowlist. On the Cookies window there is a button labeled Domains Allowlist. Simply click on this.
 Click on the image for a bigger picture
Now you have to enter the domains of which you would like the cookie values in your scripts. You can add a many as you require.
 Click on the image for a bigger picture
Pre-request Script for intercepting the cookie variable(s)
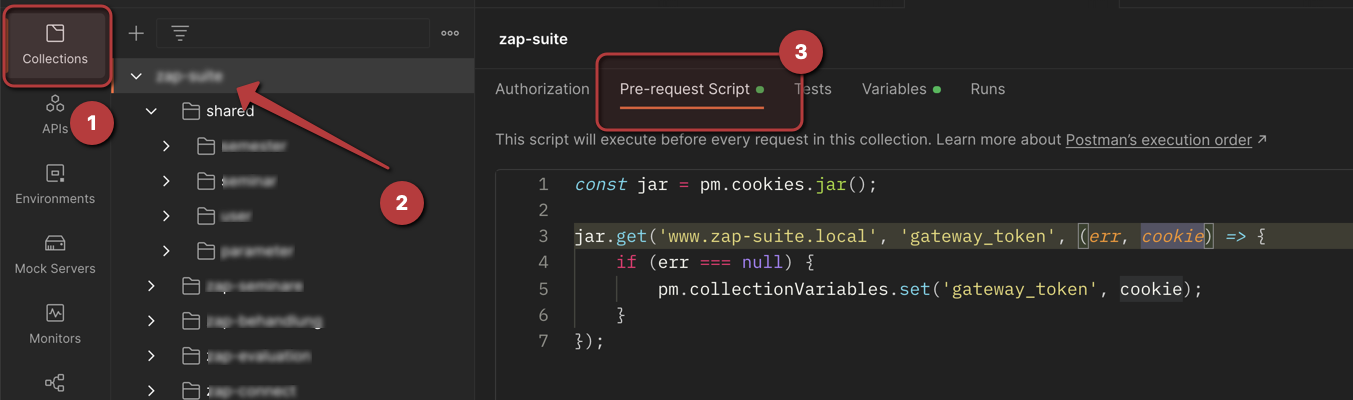
Now it is time to create a little script that will run on any request in our collection. When you do this on the highest level, it will run a Pre-request Script on every request lower in the hierarchy. In the sample image the script will be executed previous to all requests within subfolders below the collection where it has been defined.
!! If you have a collection on the same level, you have to copy the code to this collection as well. There is no such thing as a global Pre-request Script.
- Goto the Collections on the left side.
- Select the collection or folder or even a single request where you want to apply the code.
- Select the Pre-request Script tab and enter the code.
What is done here, is that the cookie values are taken from the cookie jar and when found placed on the collection variables for easy access. When nothing is found, nothing is done. There is no intensive error handling, simply because you are the developer and hopefully know what to expect.
 Click on the image for a bigger picture
Sample Code
const jar = pm.cookies.jar();

jar.get('www.zap-suite.local', 'gateway_token', (err, cookie) => {
    if (err === null) {
        pm.collectionVariables.set('gateway_token', cookie);
    }
});
A sample request
Now it is time to use what we have prepared in the earlier steps.
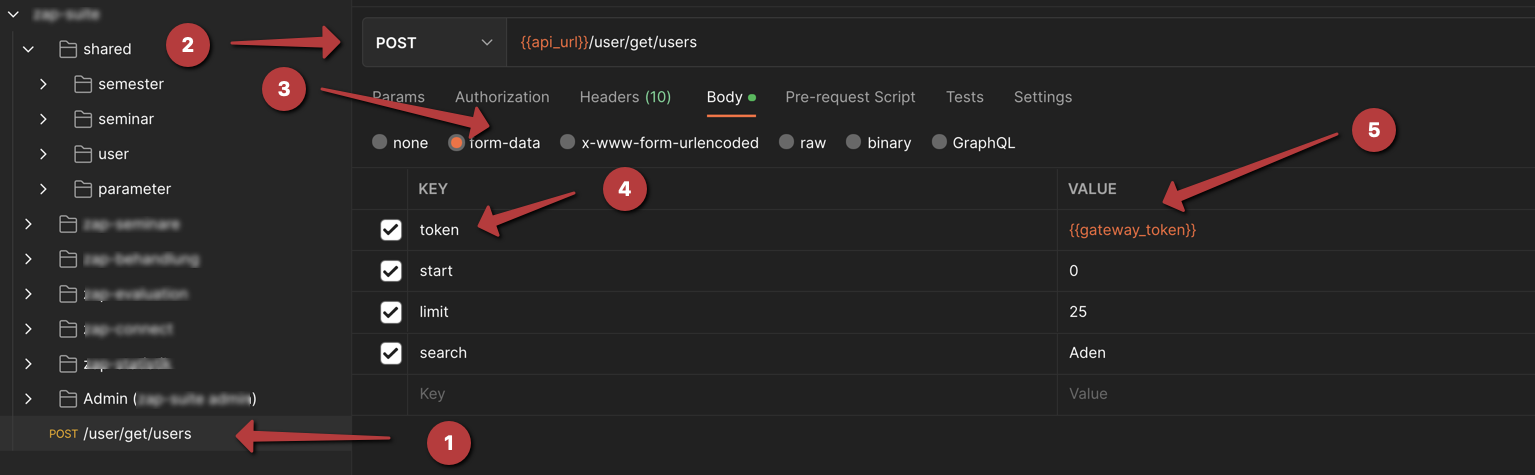
We are creating a sample request.
- The request
- It is a POST request
- In the form-data tab we enter the parameters to be sent to the server
- Special attention for the token variable which has the value {{gateway_token}} (5), as initiated by the Pre-request Script
When the request is executed the gateway_token will be sent with the proper current value from the synchronized cookies by the Postman interceptor.
 Click on the image for a bigger picture
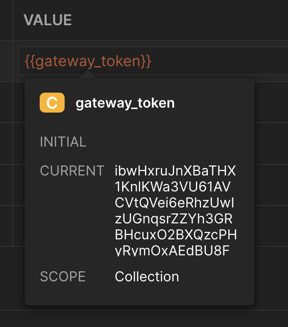
When you hover over {{gateway_token}} you will see that Postman recognizes the variable as a collectionVariable.
Links

Johan van de Merwe
More from same category

|
|

|
|

|
|

|
|

|
|

|
|

|
|

|